Vendors / Consignors & Manifests
Manage your supply sources and track inbound inventory with manifests for accurate receiving.
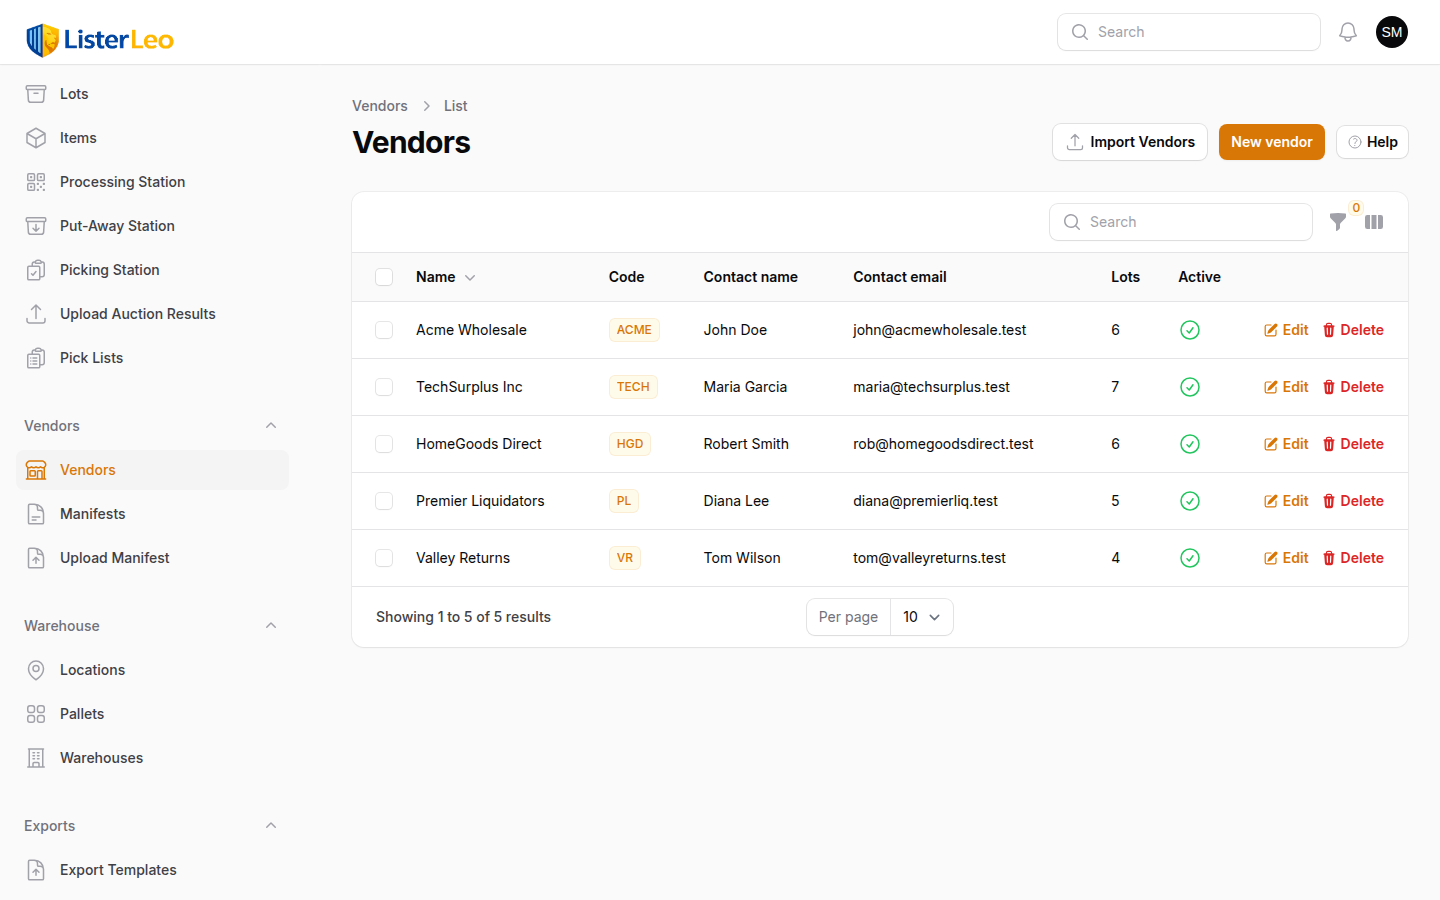
org-admin team-leadA Vendor / Consignor in ListerLeo represents the source where your inventory comes from — liquidation companies, retailers, consignment clients, or any other supplier. Every lot (and the items in it) is linked to a vendor, which enables tracking, reporting, and manifest matching.
Creating a Vendor / Consignor
- Open Management > Vendors / Consignors in the left sidebar.
- Click New Vendor / Consignor.
- Enter the vendor name (e.g., "Amazon Returns Midwest", "Target Overstock").
- Optionally enter a short Code. The hint label suggests 2–6 characters; the field accepts up to 20. The code is used as a prefix in auto-generated lot numbers and serials, so something memorable like "ACME" or "JD" works well. (ListerLeo only auto-generates codes when seeding the initial vendor at signup and from the New Auction wizard — leaving this blank on a manual create stores it as null.)
- Optionally add contact information (contact name, email, phone, address) and internal notes.
- Expand Auction Defaults to pre-fill the buyer's premium, timezone, pickup location, and terms used when this vendor is selected on a new auction.
- Expand Settings to override organization-level defaults (see Vendor Settings below).
- Click Create.
Create specific vendor entries for each source, even if they are from the same parent company. For example, "Amazon Returns - Electronics" and "Amazon Returns - Housewares" as separate vendors makes reporting and pricing much more granular.
Vendor Settings
org-adminEach vendor / consignor can override organization defaults that then cascade down to its auctions and lots. Most fields are left on Inherit and only overridden when a vendor genuinely behaves differently from your org-wide defaults.
Auction Defaults (top of the form)
- Default Buyer's Premium (%) — Pre-fills the buyer's premium on a new auction tied to this vendor.
- Default Timezone — Used for auction start/end times when this vendor's inventory is being auctioned.
- Default Pickup Location — Where buyers pick up items from this vendor's auctions.
- Default Terms & Conditions — Vendor-specific T&Cs appended to every auction (one-off auctions can override).
Cataloging / Workflow Settings (cascading)
- Auto Print Labels — Print item labels automatically when an item is cataloged.
- Use Serial Labels — Print sequential serial numbers on item labels.
- Use Existing Barcode — Reuse the scanned vendor barcode instead of generating a new one.
- Use Stock Photography — Allow stock photos instead of requiring original photos.
- Include Dimensions — Show length, width, height, and weight fields during cataloging.
- Default Condition — Condition code assigned to new items from this vendor.
- Available Condition Codes — Restrict which condition codes can be picked for this vendor's items.
- Default Quantity — Default quantity for new auction items.
- Serial Prefix — Prefix added to serial numbers on labels.
- Label Template — Default label template used when printing.
- Workflow Steps — Which steps appear in the cataloging workflow (single screen, photograph, describe, measure, condition, price, review, publish, force putaway).
The settings cascade in ListerLeo flows: Lot → Parent Lot(s) → Vendor → Auction → Organization → System Default. Setting defaults at the vendor / consignor level means you only need to override on exceptions — every non-org level shows an "Inherit" option for each setting.
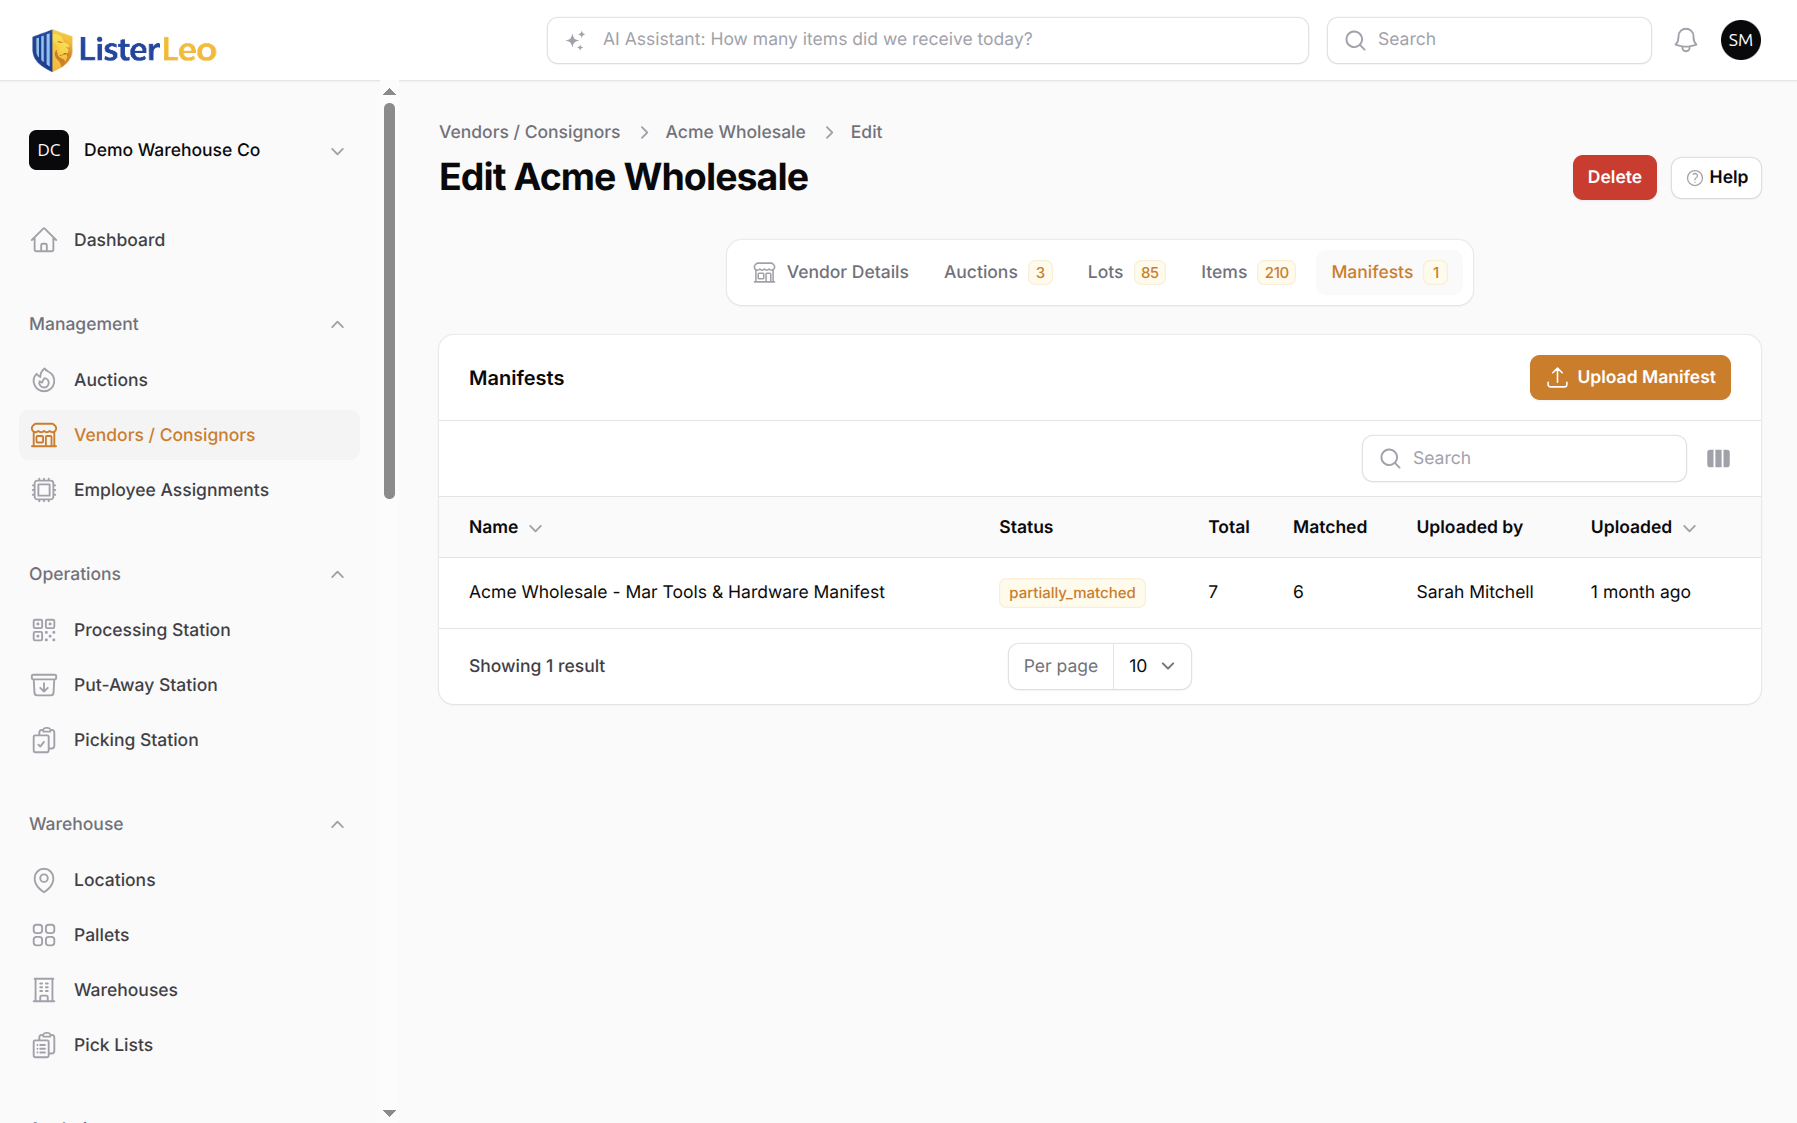
Uploading Manifests
team-lead org-adminA manifest is a CSV provided by a vendor that lists the items in a shipment. Uploading a manifest before receiving lets you verify that all expected items arrive and track any discrepancies.
How to Upload a Manifest
- Open the vendor / consignor's edit page (Management > Vendors / Consignors → click a vendor).
- Switch to the Manifests tab. The tab shows a badge with the current manifest count.
- Click Upload Manifest in the table header. This opens the Vendor Manifest Upload wizard with the vendor pre-selected.
- Optionally pick a Lot to receive the manifest into.
- Choose your CSV file (drag-and-drop or click to browse). Max size 10 MB.
- Click Upload & Continue to move to the column-mapping step.
Only .csv (and .txt) files are accepted today; Excel files need to be exported to CSV first. The upload limit is 10 MB.
Your manifest file must have a header row. ListerLeo reads the first row as headers and uses them to auto-detect column mappings in the next step.
Column Mapping
team-lead org-adminAfter uploading a CSV, ListerLeo presents the column-mapping step. This is where you tell the system which columns in your spreadsheet correspond to which manifest fields. ListerLeo auto-detects common header names and pre-fills the mapping — you can adjust any field via the dropdowns.
Manifest Fields
| ListerLeo Field | Auto-Detected Header Names | Required? |
|---|---|---|
| Barcode | barcode, upc, ean, gtin, bar_code, bar code | Recommended (used for matching) |
| SKU | sku, item_number, item number, item_id, product_id, asin | Optional |
| Title | title, name, description, product_name, product name, item_name, item name | Recommended |
| Quantity | quantity, qty, count, amount, units | Optional (defaults to 1) |
| Condition | condition, grade, quality, item_condition, item condition | Optional |
| Cost | cost, price, unit_cost, unit cost, unit_price, unit price, wholesale, msrp | Optional |
Click Preview Data after confirming the mapping to see up to 10 rows from your CSV. Then click Process Upload to dispatch the import job — ListerLeo creates one manifest item per CSV row.
Manifest Matching
scanner team-leadOnce a manifest is uploaded, ListerLeo matches scanned items against pending manifest rows to track receiving progress.
How Matching Works
Matching is an exact barcode comparison, scoped to the manifest's vendor (and, when set, its lot). It is not a fuzzy/string match. When a scanned auction item has a barcode, ListerLeo looks for the first pending manifest item with the same barcode under the same vendor's manifests; if found, the manifest item is marked matched and linked to the auction item. If the manifest row has a cost and the auction item has none, the cost is copied over.
- Match Found — The barcode matches a pending manifest row. The manifest item's status becomes matched,
received_quantityis set, and the manifest's matched-count is updated. - No Match — No pending manifest row matches the barcode. The item is still created normally. When matching is run against a specific manifest, the manifest's
extra_itemscounter is incremented. - Batch Re-Match — After upload, you can re-run matching against existing scanned items on the manifest detail page. Pending manifest rows that still have no match are marked unmatched.
Possible manifest statuses are pending, partially_matched, and completed — resolved automatically as items get matched (no matches → pending; some but not all matched → partially_matched; every row matched → completed).

Receiving Against a Manifest
scanner team-leadThe manifest edit page shows the manifest form at the top with a Manifest Items table below listing every row from your CSV. Header actions include Run Batch Match and Receiving Report.
- From the vendor's Manifests tab, click on a manifest row.
- The manifest detail view shows every row with its barcode, SKU, title, expected quantity, received quantity, cost, status, and linked auction item (if matched).
- Each manifest item's status badge is color-coded: gray for pending, green for matched, and red for unmatched. Use the status filter to focus on a single bucket.
- The manifest's overall counts (
total_items,matched_items,extra_items) update automatically as items are scanned and matched.
Manifest Discrepancies
team-lead org-adminDiscrepancies surface as differences between manifest rows and the items that actually got scanned. ListerLeo's matching service builds a receiving report with three buckets:
- Received — Manifest rows whose status is
matchedand that are linked to an auction item. - Missing — Manifest rows still in
pendingstatus (never matched to a scanned item). Likely short shipments or items lost in transit. - Extra — Auction items linked to this manifest that aren't matched to any of its rows — i.e., scans that didn't have a corresponding manifest entry. The manifest also keeps an
extra_itemscounter that is bumped each time a scan is matched against the manifest with no matching row.
Filter the manifest's Manifest Items table by status to drill into pending, matched, or unmatched rows.
Document discrepancies promptly. Many vendor contracts have a window (often 48-72 hours) for reporting missing or damaged items. The receiving report can serve as documentation for claims.
Vendor Performance Data
team-lead org-adminVendor performance data is available in Analytics > Vendor Performance. This report lets you compare vendors side by side on metrics like revenue, sell-through rate, and manifest accuracy.
Vendor Activity
team-lead org-adminVendor-related activity (manifests uploaded, items scanned, lots created, settings changes) is tracked in the system's activity log. Each entry shows the timestamp, action, and the user who performed it.