Scanning & Cataloging
The Processing Station is the heart of ListerLeo. This is where items enter the system and get cataloged for auction.
scanner catalogerThe Processing Station is a purpose-built interface designed for speed. It keeps the barcode input focused, auto-populates product data, and lets you save items with minimal clicks. A trained scanner can process 200+ items per hour using this station.
To open the Processing Station, click Processing Station under the Operations navigation group, or navigate to /admin/{org-slug}/scanning-station.
Context Selection
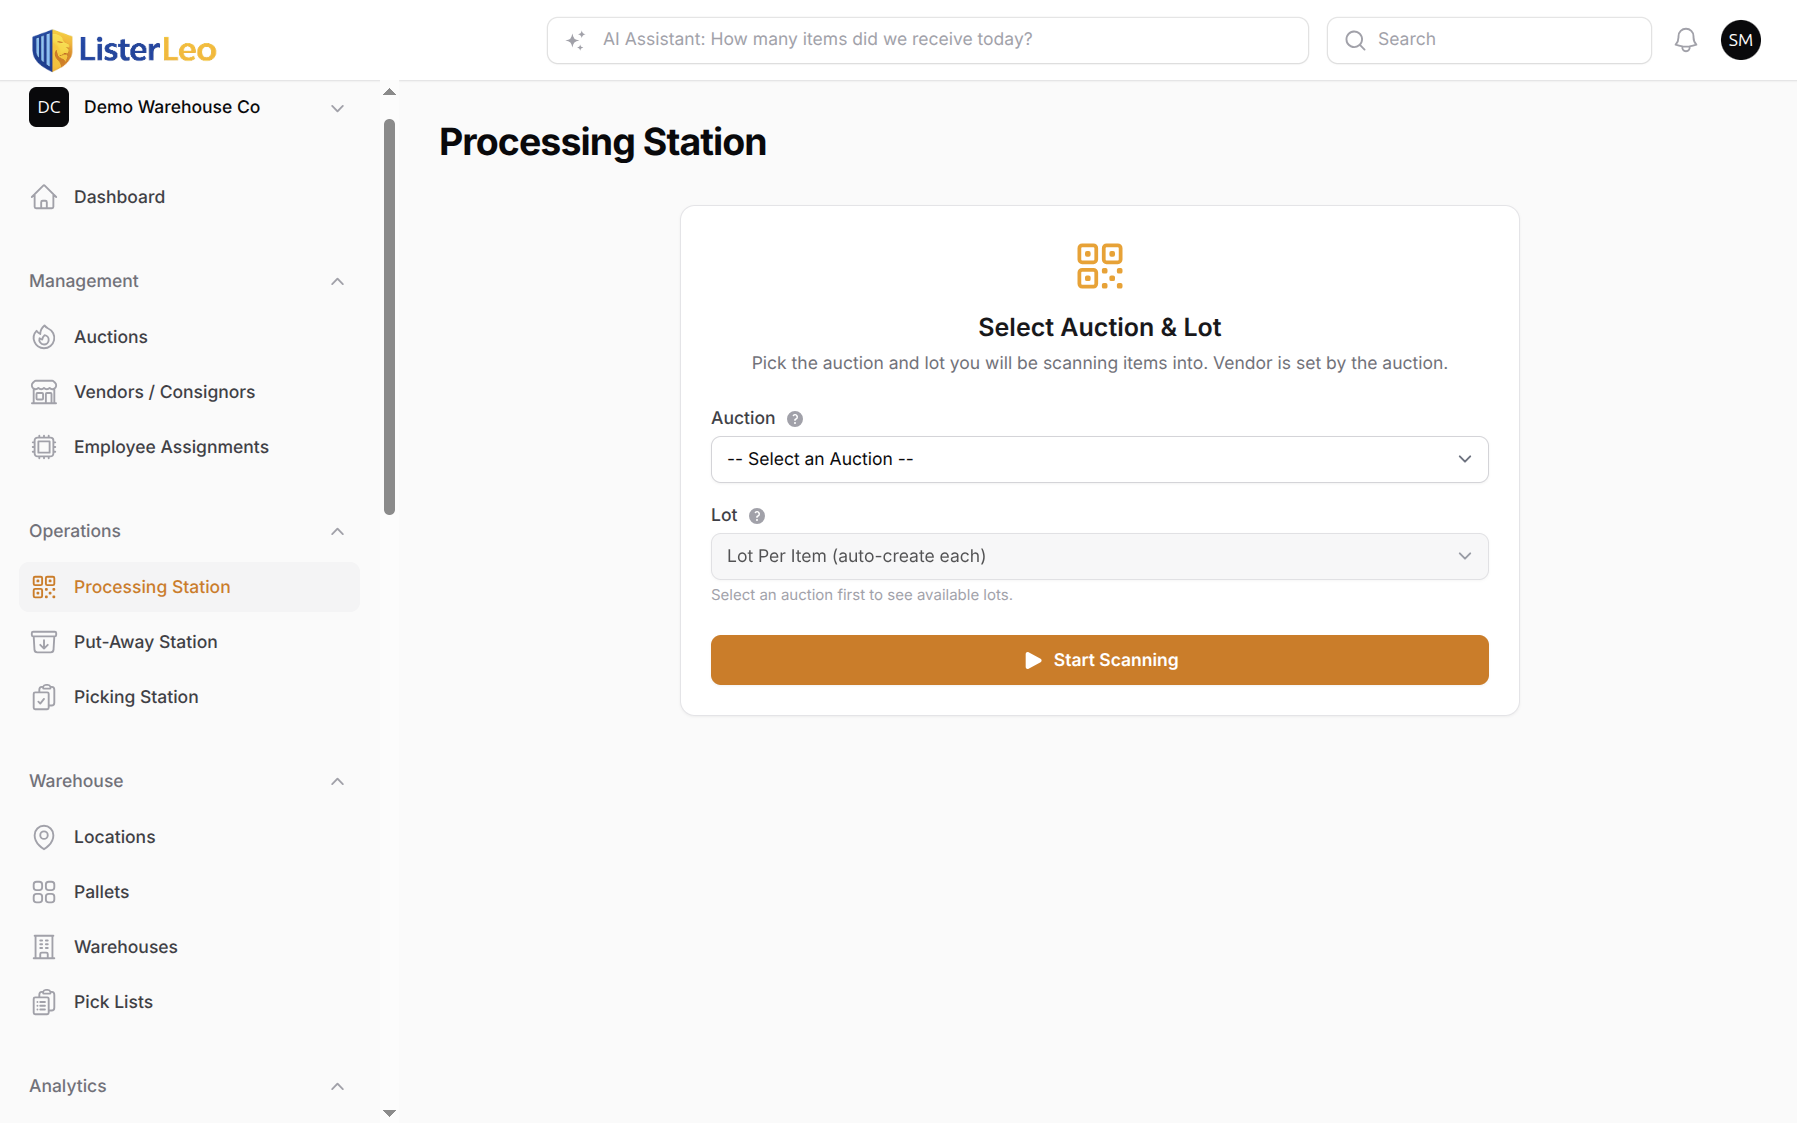
Before you can scan, you must pick a context on the Select Auction & Lot screen:
- Auction — Required. Pick the open or draft auction these scans belong to. The vendor is derived from the auction's
vendor_idand shown as a sub-line on the scanning screen — there is no separate vendor picker at the station. - Lot — A single dropdown that holds three modes: Manual Lot Control (a single auto-created lot collects scans until you click "New Lot"), Lot Per Item (a fresh lot is created for every scan), or an existing lot from the optgroup. If the auction has
lot_per_itemorforced_lot_idset in its settings, the dropdown is locked to that value and shows a 🔒 hint. - Manifest (optional) — When receiving against an expected list, picking a manifest matches scans to expected items in real time. Items not on the manifest are flagged extra.
Auto-printing of labels and the active workflow steps are not surfaced as toggles on the station — both are resolved via the settings cascade (Lot → Parent Lot(s) → Vendor → Auction → Organization → System Default) from the resolved auto_print_labels and workflow_steps settings.
Scanning a Barcode
scannerThe barcode field is the primary input on the scanning screen. It accepts UPC, EAN, ISBN, Amazon ASIN, FnSKU, and any other string that GlobalSKU can resolve.
- Make sure the cursor is in the barcode field (it auto-focuses when you enter the scanning step).
- Point your USB or Bluetooth barcode scanner at the item's barcode and pull the trigger.
- The scanner sends the barcode digits followed by an Enter keystroke, which triggers the lookup automatically.
- ListerLeo queries its product database (GlobalSKU) to find a matching product — manifest pre-fill takes priority when a manifest is selected.
- If a match is found, the title, brand, size, color, description, and an estimated starting bid are auto-filled.
- If no match is found, the station auto-opens the photo-lookup flow so you can identify the item from a photo. You can also fill in the details manually.
You can also type a barcode manually and press Enter. This is useful when a barcode label is damaged or unreadable by the scanner.
Barcode Types
- UPC-A (12 digits) — The most common barcode on US retail products.
- EAN-13 (13 digits) — Standard international barcode, commonly found on imported goods.
- ISBN (10 or 13 digits) — Used on books. ListerLeo recognizes these and looks up the product data.
- Amazon ASIN (10 characters) — Amazon's unique product identifier, starting with "B0". ListerLeo can look up product data using ASINs.
- FnSKU — Amazon's Fulfillment Network SKU, found on items sourced from Amazon warehouses or liquidation pallets. These are often printed as barcodes on Amazon fulfillment labels. ListerLeo resolves FnSKUs to their underlying product data.
- Internal Serial — ListerLeo's own serial numbers. Format is
{serial_prefix}{5-digit-sequence}(for exampleDW00042); the prefix is resolved via the settings cascade and defaults to the first three letters of the organization name.
Each scan creates a new AuctionItem record. If a barcode you scan has been seen before, a note appears with the prior item's title and serial, but a new item is still created so duplicates can be tracked. If you need to review an existing item, find it in the Items list.
Photo Identification
scannerPhotos are critical for auction listings. ListerLeo supports multiple ways to add photos to an item.
Adding Photos
- Webcam Capture — Click the Webcam button to open a live webcam feed. Position the item and capture. You can take multiple shots and they are staged in the review panel before saving.
- File Upload — Click Upload to browse and add a photo from your computer.
- Stock Photos — When GlobalSKU returns product images and your organization has
use_stock_photographyenabled, stock photos are added to the staging list automatically. You can remove or reorder them before saving. - Mobile Camera — When using the mobile app, tap the camera button to take photos directly with your device's camera.
Photo Order
The first photo is used as the primary listing image. Photos persist in the order shown in the staging grid (drag-and-drop reorders them), so put your best angle first. Most auction platforms use the first image as the hero image.
Consistent photo quality dramatically improves auction results. Use a well-lit area with a neutral background. ListerLeo works well with a simple photo booth setup.
Reviewing Item Details
catalogerAfter scanning a barcode and adding photos, review and complete the item details before saving.
Item Fields
- Title — The primary name of the item. This becomes the auction listing title. Required.
- Brand — The manufacturer or brand name.
- Size / Color — Item variant attributes.
- Description — A detailed text description. This appears in the auction listing body.
- Condition — Required. Drawn from your organization's condition codes (cascade-resolved). Has a "Sticky" toggle that auto-fills the condition you just used on the next scan.
- Condition Notes — Optional notes about scratches, damage, etc.
- Quantity — How many physical units this scan represents. Use values greater than 1 for multi-pack lots.
- Starting Bid / Reserve Price / Buy Now Price — Optional pricing fields. See Pricing Items below.
- Dimensions & Weight — Length, width, height, weight (with unit pickers). Only visible when the resolved
include_dimensionssetting is true. The AI Estimate button asks the dimension service for an estimate based on the title and description.
Condition Codes
scannerEvery item needs a condition code that describes its physical state. Condition codes are configured by your organization admin and resolved through the settings cascade — so a vendor-specific list can override the org-wide list.
Default Condition Codes
Newly provisioned organizations get this seeded list (see OrganizationSetupService::seedConditionCodes()):
- N — New — Brand new, unopened, original packaging.
- LN — Like New — Opened but unused, all accessories present.
- G — Good — Minor cosmetic wear, fully functional.
- F — Fair — Noticeable wear, fully functional.
- P — Poor — Heavy wear, may have functional issues.
- S — Salvage — For parts only, not functional.
Select a condition from the dropdown on the review step. The Sticky checkbox next to it makes the condition you just used carry forward to the next scan — useful when working through a pallet of mostly-same-condition items.
Admins can customize condition codes, add new ones, or change the display order. See Admin > Condition Codes for details.
Pricing Items
cataloger team-leadItem pricing in ListerLeo is flexible. You can set prices at the item level, or let GlobalSKU and export-time defaults fill them in.
Price Fields
- Starting Bid — The opening bid price for the auction. Pre-filled from GlobalSKU's estimated value when available.
- Reserve Price — The minimum price the item must reach to sell. Optional.
- Buy Now Price — A fixed purchase price if the auction platform supports it. Optional.
Settings Cascade
Most non-price settings in ListerLeo (label template, workflow steps, default condition, stock-photo behavior, Vendidit export defaults, etc.) resolve via the cascade in SettingsCascadeService:
- Lot.
- Parent Lot(s) (walking up the parent chain if present).
- Vendor.
- Auction.
- Organization.
- System Default from
SettingsCascadeService::SETTING_DEFINITIONS.
The Vendidit export processor uses this cascade at export time to fill in shipping, pickup, MSRP %, opening-bid calculation, and other policy fields. Item-level starting_bid, reserve_price, and buy_now_price are stored on the item itself rather than cascading.
For high-volume operations, set Vendidit export defaults at the organization or vendor level and only override at the lot or item level for exceptional cases.
AI-Assisted Lookup
catalogerListerLeo uses AI in two specific spots during scanning: photo lookup (when no barcode is available or GlobalSKU can't identify the barcode) and dimension estimation (when you don't have a tape measure handy).
Photo Lookup
Photo lookup opens automatically when you scan a barcode that GlobalSKU can't resolve. You can also trigger it manually via the No UPC - Photo Lookup button on the scanning step.
- Use the live webcam capture (or file upload) to send a clear photo of the item.
- The photo is sent through
GlobalSkuService::enrichByImageQuick()for fast interactive results (typically around 10 seconds). - If GlobalSKU recognizes the product, the title, brand, size, color, description, and an estimated starting bid are pre-filled into the review form.
- The captured photo is automatically staged as the first photo of the item.
- Review and adjust the fields, then save as usual.
AI Dimension Estimate
When the resolved include_dimensions setting is on, the review step shows a Dimensions & Weight panel with an AI Estimate button. It sends the item's title and description to DimensionEstimationService and fills in length, width, height, weight, and the corresponding unit fields with a confidence score.
AI-generated content should always be reviewed by a human before publishing. The model may misidentify items or generate inaccurate details, especially for niche or unusual products.
Lot Modes
team-leadThe lot dropdown on the context-selection screen is a tri-state picker. The three modes map 1:1 to the values stored in the auction's settings:
- Manual Lot Control (
manual_lot_control) — A single auto-created lot collects every scan until you click New Lot in the header. Best for processing a batch of related items into one lot. - Lot Per Item (
lot_per_item) — A fresh lot is auto-created for every scan. Use this for one-off or single-item lots. - Specific Lot — Pick an existing draft/cataloging lot from the optgroup. Every scan is added to that lot until you change context.
Auction-Level Locks
An auction can pre-decide the lot mode for everyone scanning into it:
- When the auction has
lot_per_itemset in its settings, the picker is locked to that mode at the station and the operator can't change it. - When the auction has
forced_lot_idset (the New Auction wizard's "Specific Lot" mode), every scan into the auction is hard-locked to that lot.ScanningStation::applyAuctionLotModeLock()re-applies this lock even if a tampered form tries to bypass it; the same logic guards the APIPOST /api/scanendpoint.
You can also reassign items to different lots after scanning from the item's detail view or using bulk actions in the item list.
Locking an auction to a specific lot is useful when you're funneling a vendor return or single-source pallet into one lot and don't want operators picking the wrong destination.
Force Put-Away
scannerWhen the resolved workflow_steps include force_putaway, every saved item is held in a two-step put-away flow before the station returns to the scanning input. This prevents items from piling up on the bench without a known destination.
Step 1 — Scan the printed label
After you save the item, the station prompts you to scan the label that just printed. The scanned value must match either the item's auto-generated serial number or its original barcode. If it doesn't match, you're asked to try again.
Step 2 — Scan the destination
Next, scan a destination. The station accepts any of:
- A pallet barcode.
- A location barcode or location code (shelf, row, bin, etc.).
- A brand-new label string —
PalletService::resolveDestination()auto-creates a Location for it on the fly so you don't have to pre-print every shelf.
If you need to bail out, the Skip put-away button skips the placement step. The item is still saved — only the location is not recorded.
Enable force_putaway by including it in the workflow_steps setting at the org, vendor, or lot level. The same flow is available in the mobile app's Force Put-Away screen, which adds dedicated camera-scan and keyboard buttons.
Scanning on Mobile
scannerThe ListerLeo mobile app is a Flutter app for iOS and Android. It uses the phone's camera as a fallback barcode scanner, supports hardware (USB / Bluetooth) scanners that emulate a keyboard, and mirrors the desktop's context-selection, scanning, review, and force-put-away flows.
See the Mobile App > Scanning section for complete mobile scanning instructions.
Bulk Scanning Tips
scannerWhen processing large volumes of items, efficiency matters. Here are strategies for maximizing throughput at the Processing Station.
- Pre-sort by auction — Group items by auction before scanning. Since the vendor is derived from the auction, you only change context once per batch.
- Enable auto-print at the right level — Set
auto_print_labelsto true on the org (or vendor, or lot) so labels print immediately after each save. - Keyboard-first workflow — Use Tab to move between fields and Enter to save. Avoid reaching for the mouse.
- Sticky condition — Toggle the "Sticky" checkbox next to the condition dropdown when you're working through a pallet of mostly-same-condition items so you only adjust outliers.
- Skip unknown barcodes — When GlobalSKU can't identify a barcode, the photo-lookup flow opens automatically. If you'd rather batch them, fill in just the title and come back later.
Track your scanning speed using the Analytics > User Productivity dashboard. Most experienced scanners process 150-250 items per hour.
Printing Item Labels
scannerAfter scanning an item, ListerLeo can print a label with the item's serial number barcode, title, and lot number. Labels are used to track items through the warehouse and during picking.
Label Formats
- ZPL Labels — For Zebra thermal printers. The most common option for warehouse labels.
- ESC/POS Labels — For receipt-style thermal printers.
Both formats are generated by LabelService from a label template. Templates and the active template per context are resolved via the settings cascade (label_template_id).
Auto-Print on Save
When the resolved auto_print_labels setting is true, the station dispatches a browser event after each successful save and a hidden iframe loads the print page, which calls window.print() on load. No extra click is needed.
Login badges for users are printed from the Users resource via the Print Login Badge row action. Pallet and location labels are printed from their respective resources.
Configure your default label format and printer in Admin > Label Settings.